A professional painting project is a structured process. It starts with a detailed estimate, moves through surface preparation, product selection, and paint application, and ends with careful touch-ups and a client walkthrough. Each stage involves clear communication, proven methods, and product-specific choices that directly impact how long the finish lasts and how good it looks.
From the moment a contractor measures your walls to the point where you approve the completed work, every step is designed to ensure durability, quality, and satisfaction. Skipping or rushing through any of these phases, especially prep work or material selection, can lead to visible flaws, early paint failure, and added costs.
This blog takes you inside that process. You’ll see what reputable painters actually do behind the scenes, which products are commonly used, and how you can avoid costly mistakes through proper planning and collaboration.
Step 1 – Detailed Estimate and Scope Confirmation
What the Estimate Covers
An accurate estimate is the foundation of a successful project. Professional painters go beyond quoting a flat price. They calculate square footage of walls, ceilings, and trim. They evaluate the condition of drywall, plaster, wood, or masonry to determine if repairs are needed. They also identify primer and coating requirements for adhesion, stain blocking, or moisture protection.
Labor hours are mapped against scheduling needs. For example, repainting a two-bedroom apartment may take three to four days, while a 5,000 sq. ft. commercial space can extend to two weeks. Additional services such as caulking, sanding, trim painting, or even wallpaper removal are also listed in the proposal.
Service-Specific Tips
-
Confirm which product lines the contractor intends to use. Reputable painters will specify brands like Sherwin-Williams, Benjamin Moore, or Behr, not just “generic interior latex.”
-
Ask about primers and finish types for each surface. A kitchen wall may require a washable eggshell, while a bathroom ceiling may need mildew-resistant satin.
-
Review warranty details, coverage expectations, and how many coats are included in the base estimate.
Step 2 – Prepping the Space
Surface Preparation Tasks
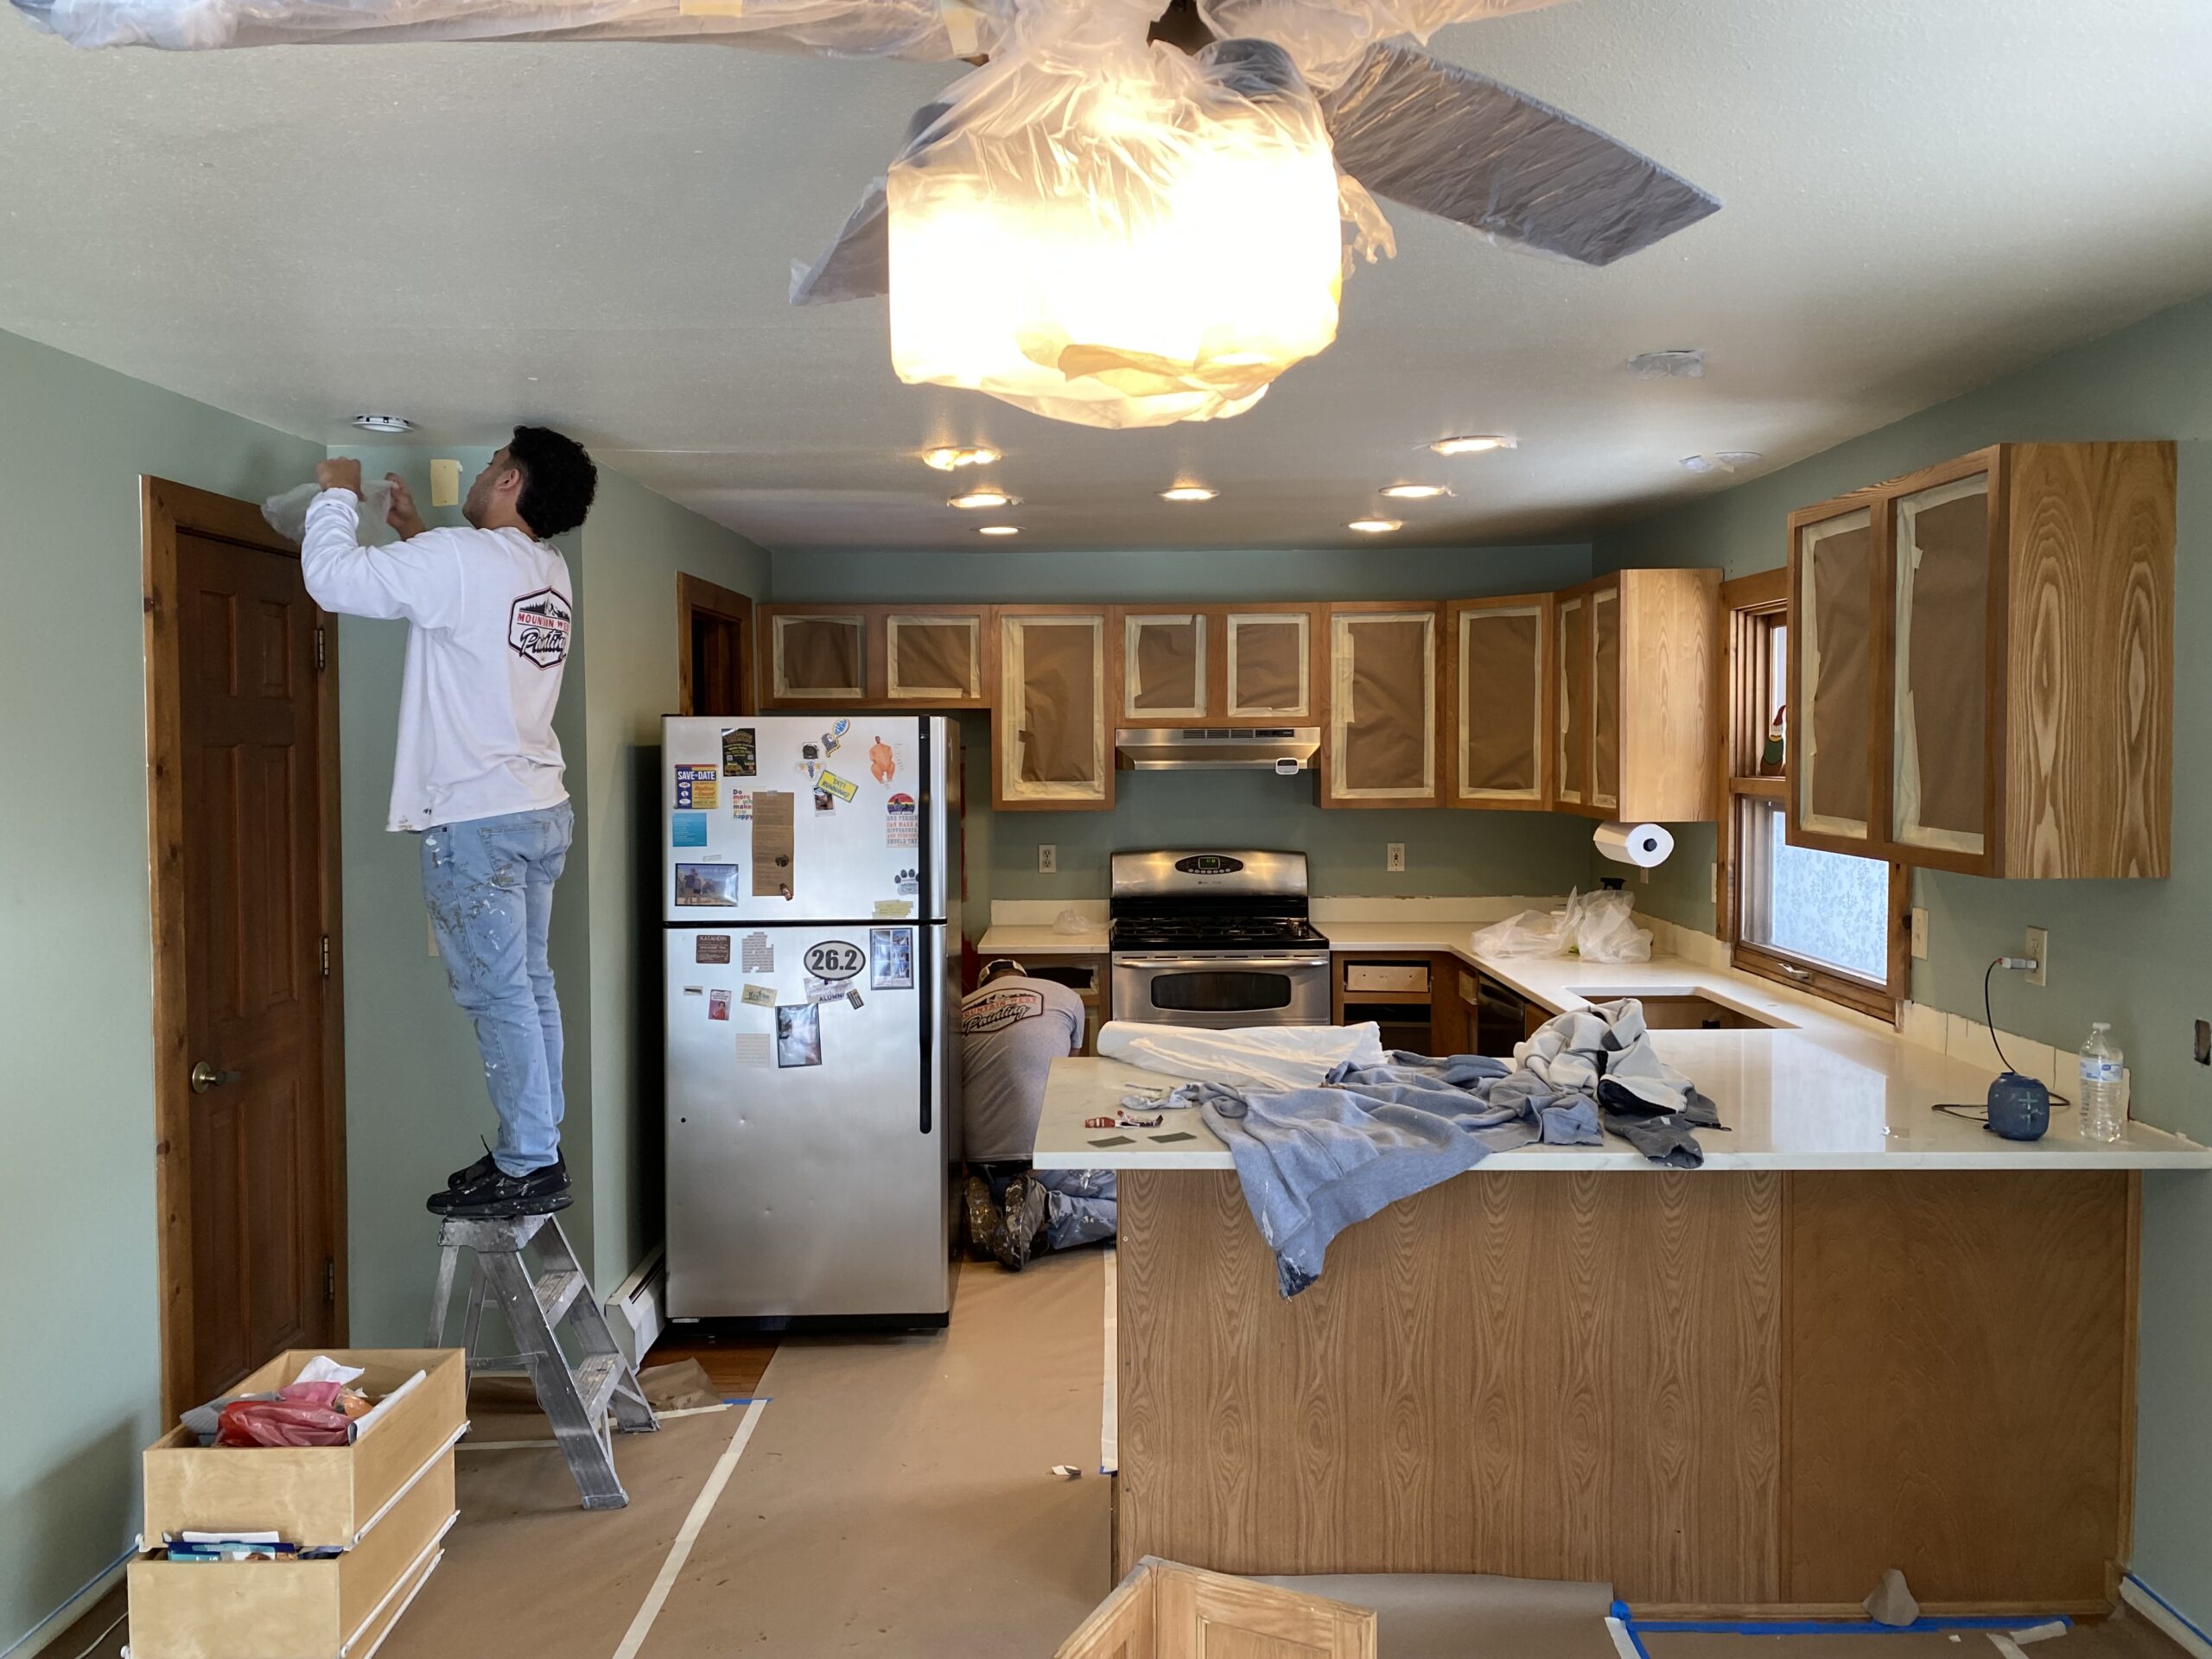
No matter how premium the paint, it won’t perform well without proper prep. Professional painters start by cleaning and degreasing walls, especially in kitchens or commercial spaces where residue accumulates.
Cracks, holes, or dents are repaired with spackle, joint compound, or elastomeric fillers depending on surface type. Uneven patches are sanded to create a smooth canvas. Finally, primer is applied to ensure adhesion, block stains, and even out porosity.
Protecting the Home
Protective measures are just as important. Trim, windows, and hardware are masked with painter’s tape. Drop cloths or plastic sheeting cover floors and furniture. Light fixtures and outlet covers may be removed or shielded. The best contractors treat the space as if it were their own home.
Products Commonly Used
-
Primers: Zinsser Cover-Stain (stain-blocking), Kilz Premium (high-hide, water-based), Sherwin-Williams Multi-Purpose (universal adhesion).
-
Fillers and Caulks: Sashco Big Stretch (flexible, prevents cracking), DAP Alex Plus (affordable interior option).
-
Sanding Tools: Makita or Festool orbital sanders for fast, dust-controlled smoothing.
Step 3 – Material Selection and Paint Ordering
Choosing the Right Paint
Selecting the right product is about more than color. Finish, durability, and VOC levels matter. Flat and matte paints hide imperfections but mark easily. Eggshell offers a balance of washability and elegance. Semi-gloss and gloss are durable for trim and kitchens.
Premium paints often cost more per gallon but cover better, resist fading, and maintain color consistency longer. Budget paints may require extra coats, raising labor costs in the long run.
Quantity and Mix
Painters calculate gallons needed based on surface area, number of coats, and porosity. Ordering the correct volume in one batch ensures consistent tint. If the same color is mixed separately, slight variations can occur.
Product-Specific Recommendations
-
Benjamin Moore Aura: ideal for high-traffic interiors with scuff resistance.
-
Sherwin-Williams Duration: durable for interiors and exteriors.
-
Low-VOC options: critical for healthcare, schools, and eco-conscious households.
Paint Selection Guide
To help visualize where specific products and finishes are used, here’s a product guide table that painters often reference:
| Surface / Area | Recommended Product | Finish Type | Why It Works |
|---|---|---|---|
| Living Room Walls | Benjamin Moore Regal Select | Eggshell | Balanced washability and elegant low sheen |
| Bathroom Ceiling | Sherwin-Williams Duration Home | Satin | Mildew-resistant, moisture durable |
| Kitchen Cabinets | Benjamin Moore Advance | Semi-Gloss | Hard, furniture-like finish, easy cleaning |
| Exterior Siding | Sherwin-Williams Duration Exterior | Satin or Gloss | UV-resistant, flexible coating |
| Hallway / High-Traffic | Benjamin Moore Aura | Matte or Eggshell | Scuff-resistant, retains color |
Step 4 – Application Process
Techniques and Methods
This is where skill meets science. Walls are coated using spray, roll, or brush methods depending on the surface and desired finish. Large, smooth areas often benefit from airless sprayers for speed and even coverage. Textured walls or smaller rooms may require rollers for control. Trim and cabinetry are handled with precision brushes.
A typical system includes primer, base coat, and top coat. Drying times are respected to prevent peeling or bubbling. Some surfaces may even be lightly sanded between coats for ultra-smooth finishes.
Service-Specific Considerations
-
Large walls: airless sprayers save time and ensure even film thickness.
-
Textured or rough surfaces: rollers help push paint into crevices.
-
Fine detail areas: angled sash brushes provide accuracy.
Quality Control During Application
Professional crews constantly inspect for drips, lap marks, or uneven sheen. Lighting is adjusted to catch imperfections early. If something looks off, it’s corrected before moving forward.
Step 5 – Between Coats and Curing
Waiting Periods
Timing is everything. Primers typically need 2–4 hours before they’re ready for paint. Most interior paints require 4–6 hours between coats, though some quick-dry products shorten that. Full curing—when paint reaches maximum hardness and durability—may take up to 30 days.
Environmental Factors
Temperature, humidity, and ventilation directly affect drying. Too much humidity slows curing. Too much heat causes paint to dry too quickly, leading to brush marks. Professionals adjust schedules and ventilation to maintain optimal conditions.
Step 6 – Final Touch-Ups
Inspecting for Imperfections
After the main coats are complete, crews inspect edges, corners, and high-traffic spots. Small bumps or dust nibs are sanded out. Missed areas receive touch-ups. The goal is consistency in color, sheen, and texture across the entire project.
Product-Specific Touch-Up Tools
-
Small angled brushes: detail work around outlets and trim.
-
Mini rollers: blending touch-ups on walls.
-
Specialty pads: smoothing cabinetry or railings.
Step 7 – Client Walkthrough and Sign-Off
What Happens During Final Walkthrough
This is where everything comes together. The painter reviews the completed job with the homeowner, pointing out what was done and where. Any concerns—missed spots, uneven areas, or cleanup issues—are noted and resolved.
Clients verify coverage, finish, and overall quality. Painters provide care instructions (such as waiting before washing walls) and warranty documentation.
Common Client Concerns
-
Color variation: Paint looks different under daylight vs. artificial light.
-
Coverage consistency: Proper number of coats eliminates thin spots.
-
Cleanliness: Reputable painters leave no tape, drips, or dust behind.
Timeline From Estimate to Walkthrough
To understand how long each stage usually takes, here’s a typical project schedule:
| Stage | Typical Timeframe | Notes |
|---|---|---|
| Estimate & Scope | 1–2 hours (visit) | Measurements, condition check, written proposal |
| Prep Work | 1–3 days | Depends on repairs, caulking, sanding, masking |
| Material Ordering | 1–2 days | Includes tinting, delivery, and product confirmation |
| Paint Application | 2–5 days | Size of project, coats required, drying times |
| Curing & Final Touch-Ups | 1–2 days | Includes sanding touch-ups, final inspection |
| Client Walkthrough & Sign-Off | 1 day | Walkthrough, punch list, warranty handoff |
People Also Ask (SEO Section)
Q: How long does a typical painting project take from estimate to final walkthrough?
Most residential projects take 3–10 days depending on size, prep, and number of coats.
Q: Why is prep work so important between estimate and painting?
Because proper prep ensures adhesion, durability, and a smooth finish.
Q: Can I change paint colors after the estimate?
Yes, but it may affect timeline and cost if custom tints or additional coats are needed.
Q: How do painters handle imperfections that appear during painting?
Professionals repair cracks, fill holes, sand, and recoat as needed.
Q: Do painters clean up after every step?
Yes, reputable painters protect the home, clean tools, and remove masking after each stage.
From Estimate to Walkthrough: What Homeowners Should Expect
The journey from estimate to final walkthrough is a structured, professional workflow: estimate → prep → material selection → application → touch-ups → walkthrough.
Each step builds on the last. Proper prep ensures adhesion. Quality products extend durability. Careful application delivers aesthetics. And the final walkthrough guarantees satisfaction.
For homeowners and property managers, the key takeaway is this: communicate clearly, review materials in advance, and verify each stage. When done right, a painting project is more than just fresh color—it’s a lasting investment in your property’s value and comfort.